The Difference Between a Concept Render and a Production-Ready Design
Sep 3, 2026
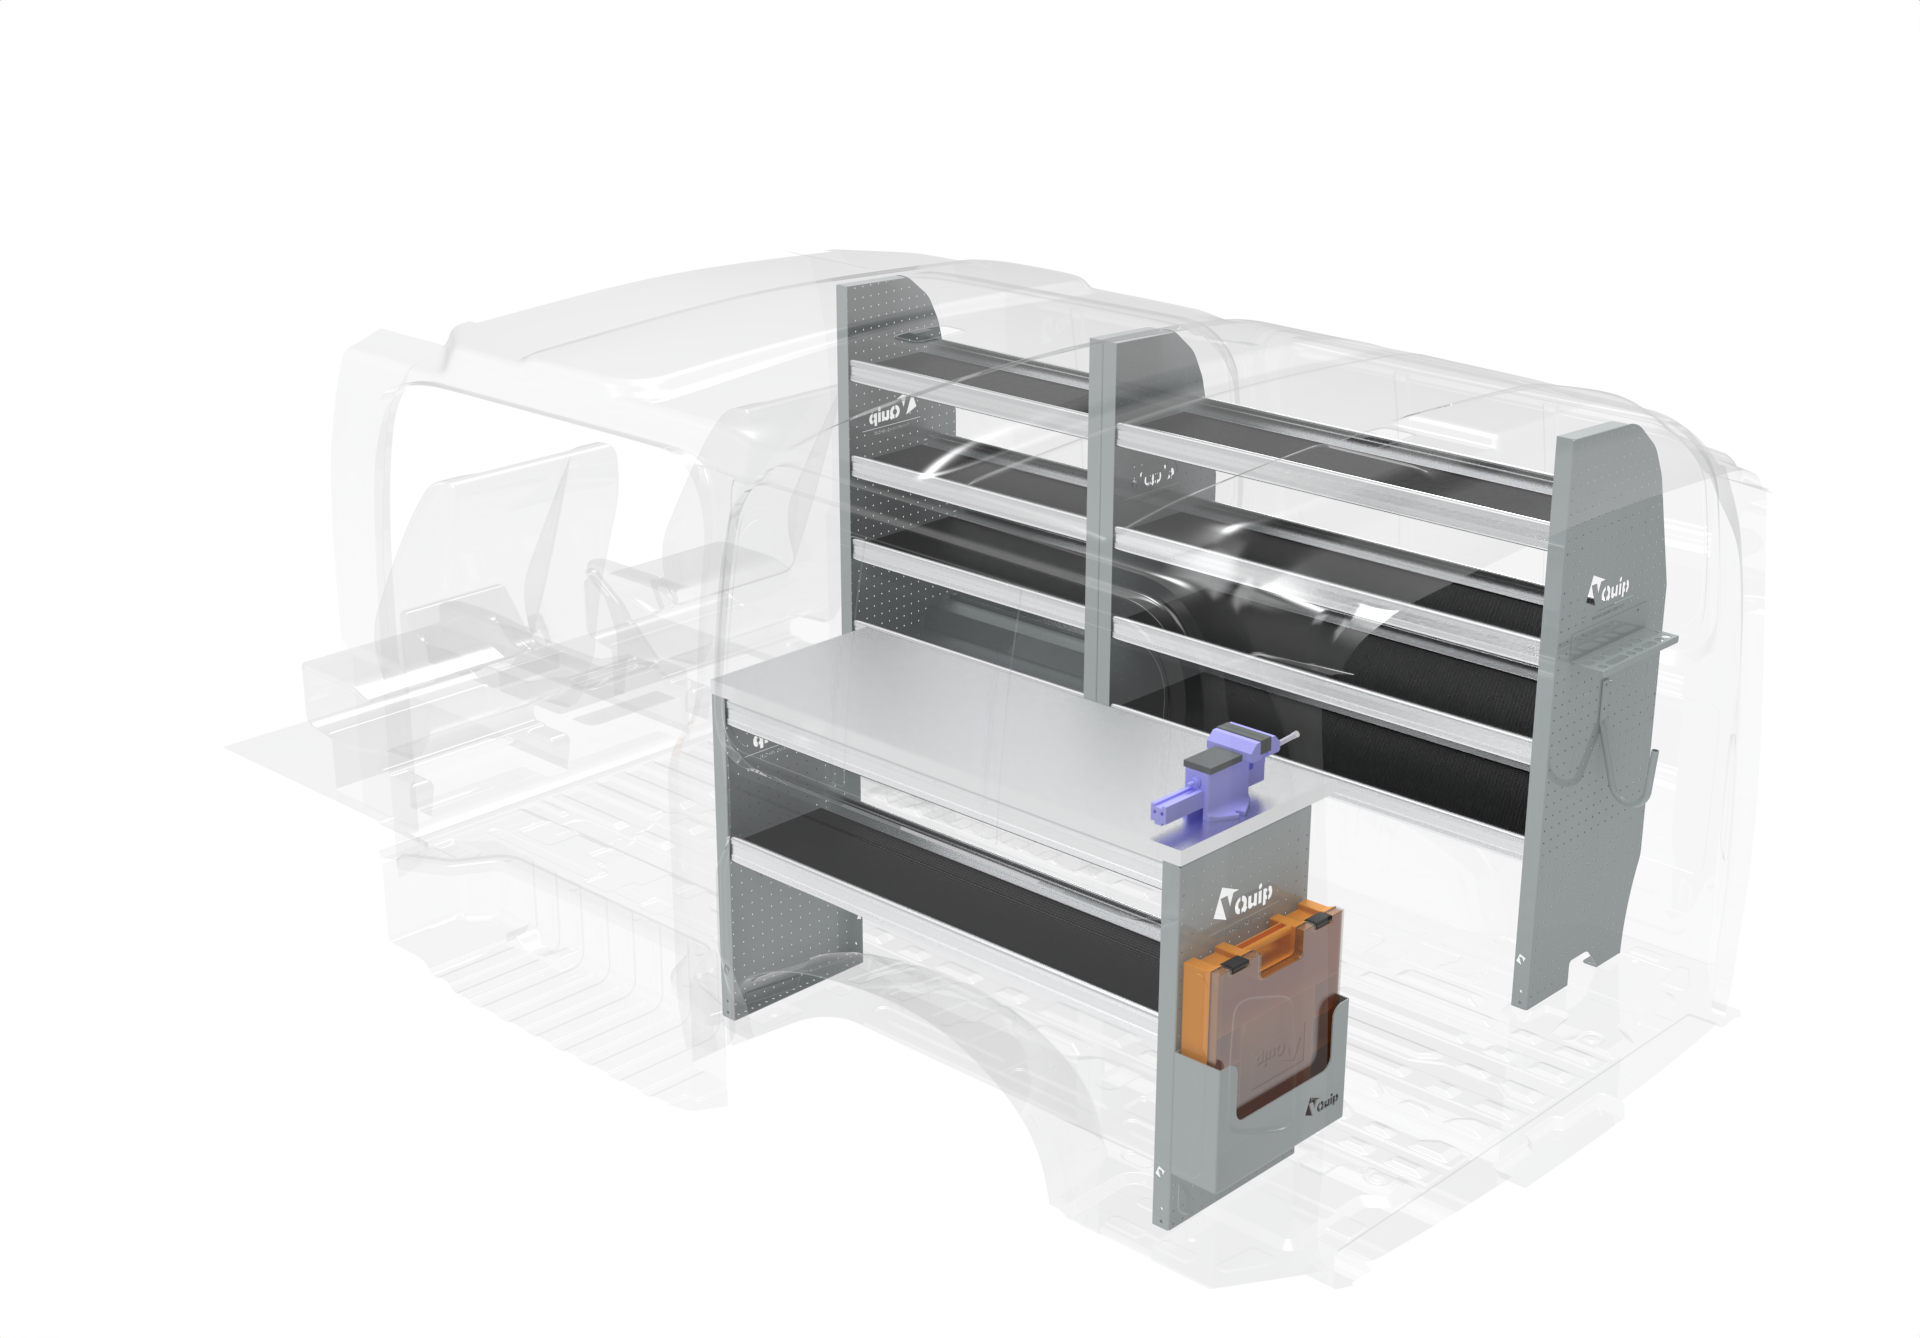
A concept render can make a proposed vehicle fitout feel remarkably complete. It shows the overall layout, the position of major components and how the finished vehicle may look.
But a clear and convincing render is not the same as a design that is ready to manufacture and install.
Between customer approval and production lies an important stage of technical development. Dimensions must be confirmed, components must be engineered, mounting methods resolved and accurate documentation created for the people purchasing, manufacturing and fitting every part.
Understanding this distinction helps fleet managers evaluate a proposal properly and allows enough time for the work required to turn a good concept into a repeatable fitout.
What is a concept render?
A concept render is primarily a communication and decision-making tool.
Its purpose is to translate operational requirements into a layout that customers, technicians and other stakeholders can understand. It can show where shelving, drawers, equipment, workspaces, barriers and electrical components are proposed within the vehicle.
This makes it easier to discuss questions such as:
- Does the layout suit the technician’s workflow?
- Can frequently used equipment be reached from the preferred door?
- Is sufficient space allowed for tools, parts and bulky items?
- Does the balance between storage and usable floor space feel right?
- Have the main operational requirements been interpreted correctly?
A render can be detailed and visually realistic, but it will not necessarily contain every dimension, fastening detail, material specification or manufacturing instruction. Some elements may still be represented at a high level while their exact construction is developed.
That does not make the concept incomplete for its purpose. It simply means it is answering a different question.
The concept asks: Is this the right solution?
The production-ready design asks: Exactly how will we build it?
Approval is the start of technical development, not the end
Once the customer is comfortable with the proposed layout, the design can move into technical development.
At this stage, the overall intent must be converted into a set of controlled details. A shelving unit shown in a render now needs confirmed dimensions, materials, folds, joins, fasteners and mounting points. A battery system needs defined component locations, cable routes, protection, access and ventilation considerations. A drawer must fit not only within the available space, but also open without interfering with doors, handles or surrounding equipment.
This process is where engineering and mechanical judgement become especially important. The designer must preserve the approved customer outcome while resolving the practical realities of manufacturing, installation, servicing and cost.
The transition may also uncover conflicts that were not obvious in the concept. Vehicle cavities are rarely simple rectangular spaces. Wheel arches, door mechanisms, structural members, factory wiring, airbags, sensors, fuel systems and high-voltage components can all influence where and how equipment can be installed.
These details need to be resolved before the fitout reaches the production floor.
Vehicle measurements and clearances must be confirmed
Vehicle specifications and digital models provide a useful starting point, but critical interfaces still need to be verified.
The production design must allow for the actual shape of the vehicle and any relevant manufacturing tolerances. Designers may need to confirm clearances around doors, seats, factory tie-down points, wheel arches, roof ribs and service access areas.
They also need to consider how components move during use. A drawer requires room for its slides and handle. A fold-down vice or workbench needs an unobstructed operating area. Removable cases must be able to pass through door openings. Equipment mounted near a sliding door must not interfere with the door mechanism or the technician’s access.
A component that appears to fit in a static image may not work once its full range of movement is considered. Production documentation needs to account for both its installed position and how it will be used.
Mounting methods need to be resolved
A concept render may show where a component is located without defining exactly how it is attached.
For production, that question cannot remain unanswered. The mounting method must suit the component, its expected load, the vehicle structure and the installation environment. It should also account for what is located on the other side of the mounting surface.
This is particularly important as commercial vehicles incorporate increasingly complex electrical, safety and drivetrain systems. Designers and installers need to understand the vehicle before drilling, fastening or routing services.
Where appropriate, a design may use factory mounting or tie-down points, purpose-designed brackets or other installation methods suited to the application. The correct approach depends on the vehicle and the fitout requirements, rather than appearance alone.
The complete system must work together
Individual elements cannot be designed in isolation.
Shelving affects access and weight distribution. Flooring influences mounting and available internal height. A roof rack may compete for space with ventilation, lighting, solar equipment or roof-mounted air conditioning. Batteries and inverters require suitable locations while also influencing payload, service access and storage.
The production-ready stage brings these systems together. It considers how cabinetry, electrical equipment, accessories, vehicle interfaces and technician workflow interact as one completed fitout.
This is also where payload needs to remain visible. The weight of the fitout, accessories, tools, parts, occupants and operational equipment all contribute to the completed vehicle’s load. Monitoring these inputs throughout design is more useful than discovering a problem after everything has been specified.
Production documentation removes ambiguity
A production team should not need to interpret the original sales discussion or make major design decisions while the vehicle is being fitted.
Clear documentation gives purchasing, manufacturing and installation teams a consistent set of instructions. Depending on the project, this may include:
- Detailed shop drawings with dimensions and material specifications.
- Assembly and installation drawings.
- A bill of materials identifying the required components and quantities.
- Stock codes linked to the correct parts.
- Electrical information and component schedules.
- Fitting instructions and relevant quality checks.
These documents turn design intent into information that different people can act on. They also make it easier to repeat the same fitout across multiple vehicles and installation locations.
Without adequate documentation, small decisions can be made differently from one build to the next. That creates variation, complicates purchasing and makes quality more dependent on individual interpretation.
Cost is influenced by design detail
Technical development is not only about whether a component can be built. It should also consider whether it can be built efficiently and repeated consistently.
Two solutions may perform the same function but require very different amounts of material, fabrication time or installation effort. A production-focused designer can look for opportunities to simplify construction, reduce unnecessary complexity, use common components and improve access for installers, without losing the customer-approved outcome.
These decisions are often invisible in the final appearance of the fitout, but they can have a meaningful effect on production efficiency and whole-of-program cost.
This is another reason a render should not be treated as the final engineering document. It communicates the proposed outcome, while technical development determines the most practical way to deliver it.
The prototype provides physical validation
Even a carefully developed production design benefits from being tested in a physical vehicle, particularly before a larger fleet rollout.
The first build allows the fitout team and customer to validate installation, clearances, access and technician workflow in the real vehicle. It can identify adjustments that are difficult to assess fully on screen.
The prototype should not be viewed simply as the first vehicle in the rollout. It is a validation stage that helps refine the design and documentation before they are repeated. Once approved changes have been incorporated, the drawings, bill of materials and fitting instructions can form a more reliable standard for subsequent vehicles.
Both stages are essential
A concept render and a production-ready design are not competing versions of the same thing. They are two stages serving different purposes.
The concept render allows the customer and fitout provider to align on layout, workflow and overall intent before extensive technical work is completed. The production-ready design then converts that approved direction into accurate, buildable and repeatable information.
Skipping either stage can create problems. Moving into detail too early may waste engineering effort on a layout the customer has not approved. Moving into production with only a concept leaves important technical decisions unresolved.
VQuip’s process connects these stages, from understanding the operational requirement and developing the concept through to shop drawings, bill of materials, production documentation, prototyping and rollout.
When reviewing a proposed vehicle fitout, the most useful question is not only, “Can we see what it will look like?” It is also, “What work will turn this concept into a fitout that can be built correctly and consistently?”